| Inside: How to make a stunning wedding invitation card? This comprehensive guide provides step-by-step instructions for designing stunning DIY wedding invitations from home. Learn about using pre-designed templates, choosing the right paper, adding personal touches, where to print your invitations affordably, and what to write and how to end a wedding invitation card. With these expert tips, you can create beautiful, personalized invitations that will wow your guests. |
When my best friend was getting married, she decided to create her own wedding invitation cards. One sunny Saturday afternoon, we gathered around her cozy kitchen table, surrounded by a rainbow of papers, ribbons, and embellishments. The warm, golden light filtered through the windows, casting a gentle glow on our workspace. The air was filled with the sweet scent of homemade lemonade, and the sound of our laughter echoed through the room as we dove into the world of DIY.
Using a predesigned template in Corjl, we spent hours experimenting with different fonts and colors. We clicked through endless options, tweaking the design until it felt just right.
Each tweak made the design more perfect, more her. The joy in her eyes as she saw her vision come to life was truly magical.
We chatted and giggled, each click and adjustment adding to the excitement of the upcoming wedding.
A few weeks later, I received my invitation in the mail. As I carefully unsealed the envelope, my fingers brushed against the soft, textured linen paper. I felt a rush of emotion. The invitation was even more beautiful than I remembered, wrapped in a delicate silk ribbon and adorned with a wax seal. The elegant design and the personal touches made it feel as though I was holding a piece of her heart.
It wasn't just an invitation; it was a beautiful expression of her love and excitement for the big day.
Each detail spoke volumes, and I knew every guest who received one would feel the same.
Getting Started: Why DIY Wedding Invitations at Home?
DIY wedding invitations are cost-effective and add a personal touch that pre-made invitations often lack. Plus, it's a fun project you can do with your partner or bridal party. Imagine the joy of creating something unique that reflects your personality and love story. By making your own invitations, you have full control over the design, materials, and wording, ensuring that every detail is perfect. Additionally, DIY projects like this can be incredibly rewarding and provide a sense of accomplishment. It’s not just about saving money; it’s about crafting an experience that your guests will treasure and remember.
Making your wedding invitations at home allows you to infuse your style and preferences into each piece. You can experiment with different textures, colors, and embellishments to create a truly one-of-a-kind invite. Plus, every time someone compliments your invitations, you'll feel the pride of knowing you made them yourself.
So gather your supplies, roll up your sleeves, and dive into the delightful world of DIY wedding invitations. Not only will you save money, but you'll also create beautiful, personalized invitations that perfectly capture the spirit of your special day.

Make Your Wedding Invitation Card Using Pre-Made Templates
Creating wedding invitations doesn't have to be daunting, especially when you use pre-made templates. Corjl, an online editor, makes this process a breeze. Here’s why you should consider using Corjl for your wedding invitations:
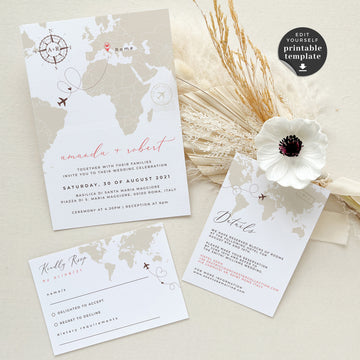
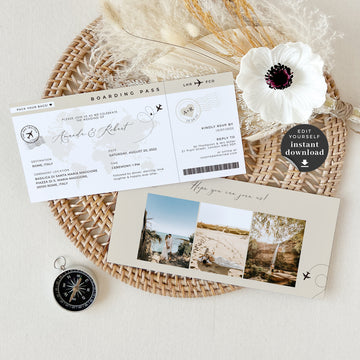
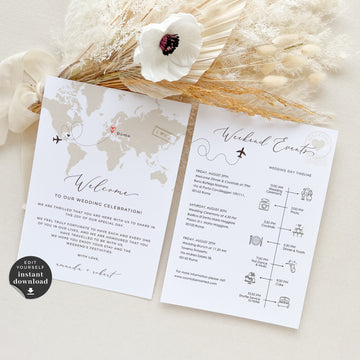
- Edit Templates Easily: Corjl offers a wide range of predesigned templates that you can customize to fit your wedding theme. This means you can easily find a design that matches your vision and style. If you're looking for a pre-designed template, check out our shop here.
- Try Before You Buy: One of the best features of Corjl is the free demo, allowing you to try the product and the app before making a purchase. This ensures you are comfortable with the platform and satisfied with your design before committing.
- Personalize Your Design: With Corjl, you have the flexibility to change typography, the color of text, add or remove blocks of text, change the background color, and even add your own photos. This level of customization allows you to create a truly unique and personalized invitation that reflects your personality and wedding theme.Using Corjl not only simplifies the invitation creation process but also ensures that your final product looks professional and polished. The platform is user-friendly, making it accessible even if you don’t have prior design experience.
Pro Tip: Watch our video tutorial below to see how easy it is to create a stunning wedding invitation using Corjl. Then you can try the free demo for this design from a desktop computer and see how easy it is to edit your template. Free demo link.
Using Corjl not only simplifies the invitation creation process but also ensures that your final product looks professional and polished. The platform is user-friendly, making it accessible even if you don’t have prior design experience.
What to Write in Your Wedding Invitation
Now that you've found the perfect design that matches your vision, it's time to write the wording on the card. This is the most important information that should go in your wedding invitation card:
- The Hosts: Traditionally, the hosts of the wedding are listed at the top of the invitation. This could be the bride's parents, the groom's parents, both sets of parents, or the couple themselves.
- The Couple's Names: Make sure to include both your names prominently. For a formal invitation, use full names including middle names. For a casual invite, first names only are acceptable.
- The Date and Time: Clearly state the date and time of your wedding. You can write it out in full for a formal touch (e.g., "Saturday, the tenth of September, two thousand twenty-four, at four o'clock in the afternoon") or use numerical formatting for a simpler look (e.g., "09.10.24 at 4:00 PM").
- The Venue: Provide the full address of the wedding venue. If the location is well-known, the venue name and city might suffice. For less familiar locations, include the street address.
- Dress Code: If there is a specific dress code, mention it so guests know how to dress appropriately for your wedding.
- RSVP Information: Let your guests know how and when to RSVP. Include a deadline for responses and any additional details about how they should RSVP (e.g., by mail, phone, or online).
How to End Your Wedding Invitation
Ending your wedding invitation properly ensures that your guests have all the information they need and feel excited about your big day. Here are some tips on how to end your invitation:
- Reception Details: If the reception is at a different location or time than the ceremony, include a line about it (e.g., "Reception to follow at [location]").
- Additional Instructions: Provide any additional instructions, such as directions to the venue, accommodation details, or your wedding website for more information.
- Gratitude: End with a warm note expressing your excitement and gratitude (e.g., "We can't wait to celebrate with you!" or "We look forward to sharing our special day with you!").

Choosing the Perfect Paper
Once your design is ready, the next step is to choose the right paper. The type of paper you select can significantly enhance the look and feel of your invitation.
- Gloss: Ideal for photo-heavy designs, gloss paper offers vibrant colors that make your design pop. This thick, reflective paper is perfect for creating a stunning visual impact (130lb weight, 16-point thickness). Note: It is not recommended for cards that will be written on.
- Matte: The most popular choice! Matte paper has a thick, smooth texture, providing a clean, crisp backdrop for your designs. It's also great for writing on, making it versatile and elegant. (130lb weight, 16-point thickness).
- Linen: Linen paper is the way to go for a touch of elegance. Its beautiful, embossed texture creates a subtle, refined impression, perfect for traditional weddings and special occasions. (100lb weight, 12-point thickness).
Printing Your Invitations
After designing and choosing your paper, you can print your invitations at a local print shop or through our partner, Prints of Love, if you're in the US. Prints of Love offers high-quality printing at a budget-friendly price, and they even provide free white envelopes for your invitations.
Adding the Perfect Embellishments
Embellishments can turn a simple invitation into a keepsake. Here are some ideas to enhance the beauty of your DIY wedding invitations:
- Silk Ribbon with Raw Edges: Adds a touch of luxury and elegance. Perfect for tying around your invitation for an extra special touch.
- Dried Flower Fused on Wax Seals: Peel the adhesive from the back and stick to the envelope for a rustic, charming look.
- Custom Wax Seal Logo Stickers: Personalize with the bride and groom's initials for a unique, sophisticated detail.
Imagine your guests opening their invitations and being greeted with the delicate scent of lavender, the elegant touch of silk ribbon, or perhaps a tiny charm that brings back childhood memories of adventure and wonder. Each of these elements can make your wedding invitations unforgettable.
If you plan to use ribbon to tie around your wedding invitation, we highly recommend double envelopes. This will better protect your stationery when it travels through the mail to your guests. The beautifully tied invitation can be placed inside the inner envelope, which is then put inside the outer envelope. This gives the invitation the protection it needs.

Where to Buy Supplies
You can purchase all the supplies you need for your DIY wedding invitations from various suppliers. Here's a list of recommended suppliers for ribbons, dry flowers, wax seals, wax seal stickers, metal charms and envelopes:
Supplier List:
- Silk Ribbons: IngenueStudio, ArgenteXVI
- Dry Flowers: ElfHouseFinds
- Wax Seals with Dry Flowers: MeganBruceDesigns
- Wax Seal with Initials: DianaWaxSealShop
- Envelopes: Cards and Pockets
- Cardstock Paper: Cards and Pockets
- Metal charms: CharmToo
Conclusion: Make It Personal and Fun
Creating your own wedding invitations can be a rewarding and enjoyable experience. Using tools like Corjl and high-quality printing services like Prints of Love, you can design beautiful, personalized invitations without breaking the bank. Add your own touches with various embellishments and watch as your vision comes to life.
Remember, just like when my best friend and I crafted her invitations, your wedding invitation is the first glimpse your guests will get of your special day. Make it memorable, make it personal, and most importantly, have fun creating it!
Frequently Asked Questions
Q: How do I get started with designing my wedding invitation?
A: Begin by selecting a pre-designed template from our printable wedding invitations template collection. Customize it to match your wedding theme by editing the typography, colors, and layout. Use the free demo to experiment before finalizing your purchase.
Q: What type of paper should I use for my wedding invitations?
A: The choice of paper depends on the look and feel you want to achieve. Glossy paper is ideal for photo-heavy designs, matte paper offers a smooth and writable surface, and linen paper provides an elegant, textured finish.
Q: How can I add a personal touch to my wedding invitations?
A: Adding embellishments like silk ribbons, dried flower wax seals, and custom wax seal logo stickers can make your invitations unique and personal. These touches reflect your style and add a special element to your invitations.
Q: How do I end a wedding invitation card?
A: Ending your wedding invitation card with a warm and personal touch is important. Common phrases include:
- "We look forward to celebrating with you."
- "Please join us for a night of love and laughter."
- "Your presence will make our celebration complete." Make sure to include any RSVP instructions and a thank you note for your guests' anticipated attendance.
Q: What is the order for assembling a wedding invitation suite?
A: Start with the invitation card at the bottom, followed by the reception card, details card, and RSVP card with its return envelope. Use a belly band to hold everything together, and consider adding a vellum jacket and ribbon for an extra touch of elegance. For detailed information on this read this article "Wedding Invitation Suite: What to Include and How to Assemble It".
Q: Can I print my invitations at home?
A: Yes, you can print your invitations at home if you have a high-quality printer and suitable paper. However, for the best results, we recommend using a professional printing service like Prints of Love, which offers high-quality printing and free envelopes.
Q: Where can I buy the supplies for my DIY wedding invitations?
A: You can purchase supplies such as ribbons, dry flowers, wax seals, wax seal stickers, and envelopes from various suppliers. Refer to our supplier list for recommendations.
Some of the products included in our supplier list are from affiliates with whom we have a partnership. This means we may earn a commission if you make a purchase via the links provided. Rest assured, we only recommend products that we believe will add value to your DIY wedding invitations. Thank you for supporting our blog and helping us continue to provide you with quality content and recommendations.